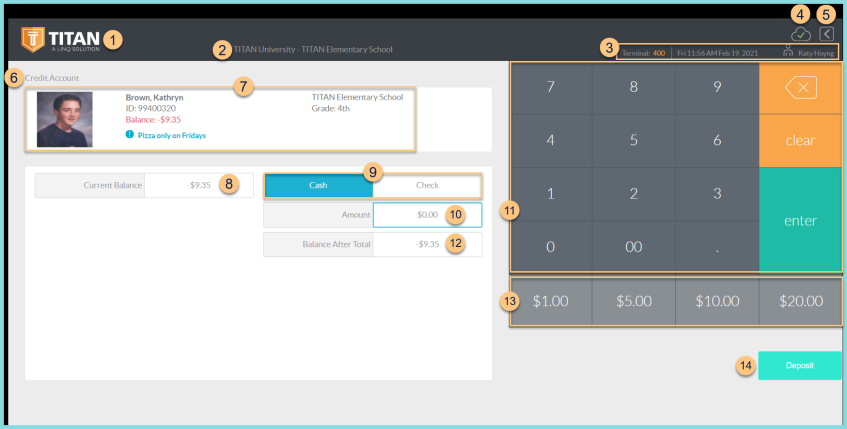
Credit Account
pos.titank12.com
-
TITAN Logo - click to enter full screen mode
-
Notice the District Name and Cafeteria Name
-
Notice the Terminal Number, Date, Time, and Cashier Name
-
Cloud Icon - notice the status of the cloud icon
Green Check - connected to cloud
Gray Dash - not connected to cloud
Red Number - number of transactions saved in browser for communication when connection returns -
< - click to return to the home screen
-
Notice the indication of Credit Account mode
Date (not pictured, changed date only) - notice the date if different than today -
Notice the selected person's photo, name, ID or POS ID, Balance, Assigned or Enrolled Building, Grade (students only), and alert message if applicable.
-
Notice the Current Balance.
-
Select the payment item:
Cash - click to select cash as the payment method
Check - click to select check as the payment method -
Amount - enter the amount paid
-
Keyboard - use the on screen keyboard to type in lieu of a physical keyboard
-
Quick Numbers - use the quick numbers to enter a common amount quickly
-
Balance After Total - notice the balance after total (Balance After Total = Current Balance + Amount)
-
Deposit - click to apply payment to account